
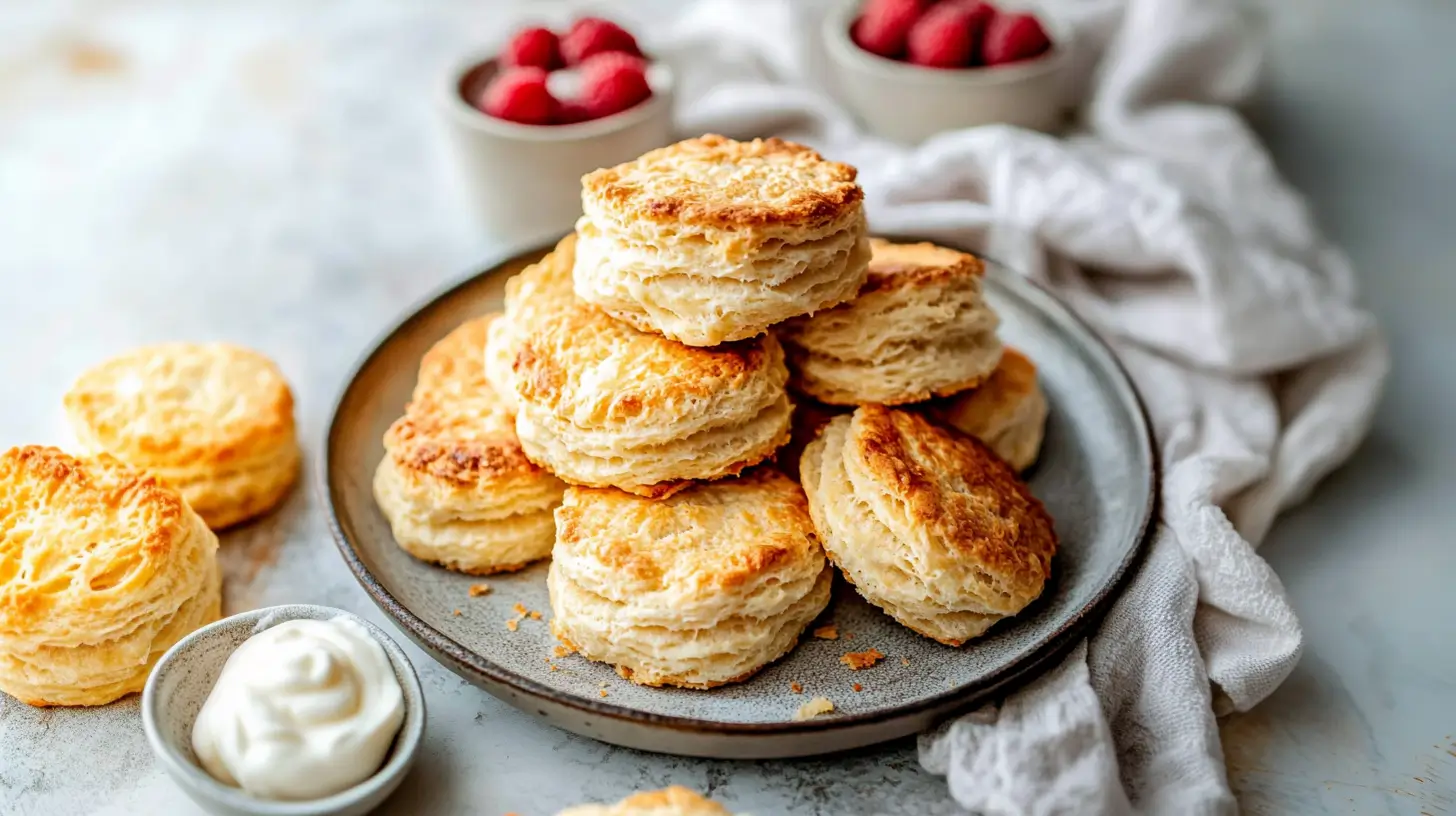
There’s something deeply comforting about a warm, flaky biscuit fresh from the oven. The crispy exterior, soft interior, and rich flavor—it’s a universal breakfast classic that feels like home. But for those following a gluten-free lifestyle, traditional biscuits can be a thing of the past. You may have felt that longing for the perfect biscuit but were unsure how to recreate it without gluten. Don’t worry, making gluten-free buttermilk biscuits that are just as delicious and flaky is entirely possible. In this guide, you’ll discover how to make these biscuits at home with ease. Whether you’re gluten-sensitive, following a health-conscious diet, or just trying something new, gluten-free buttermilk biscuits are the answer.
Table of Contents
Why You Should Try Gluten-Free Buttermilk Biscuits
If you’ve been missing out on flaky biscuits due to dietary restrictions, then it’s time to bring them back into your life—minus the gluten. Gluten-free buttermilk biscuits provide all the comfort of the traditional version, but without the ingredients that can cause issues for people with gluten sensitivity or celiac disease.
Benefits of Gluten-Free Biscuits:
- Ideal for Gluten-Sensitive People: Gluten-free biscuits allow you to enjoy your favorite baked goods without worrying about gluten intolerance or allergies.
- Perfect for Health-Conscious Diets: By using healthier alternatives, these biscuits can cater to various dietary needs.
- Versatile: They make for a perfect breakfast, side dish, or even a snack.
Whether you’re baking them for yourself or for a family gathering, gluten-free buttermilk biscuits are a wonderful way to enjoy a timeless comfort food with a modern twist.
Ingredients You Need for Gluten-Free Buttermilk Biscuits
To make the best gluten-free buttermilk biscuits, you’ll need to gather the right ingredients. Substituting traditional wheat flour for gluten-free flour can be tricky, but with the right substitutions, you can achieve the perfect texture and taste.
Essential Ingredients for Gluten-Free Buttermilk Biscuits:
- Gluten-Free All-Purpose Flour (2 cups): This is the key ingredient, as it replaces wheat flour. Look for one with xanthan gum included, as it helps bind the ingredients together and adds structure to the biscuits.
- Baking Powder (1 tablespoon): This helps the biscuits rise and become light and fluffy.
- Baking Soda (1/2 teaspoon): Used in conjunction with the acid from buttermilk, baking soda helps create the desired texture.
- Salt (1/2 teaspoon): Enhances the flavor of the biscuits.
- Cold Butter (1/2 cup): Butter adds moisture and richness. The cold butter helps achieve the flaky texture that makes biscuits so irresistible.
- Buttermilk (3/4 cup): The tang of buttermilk not only imparts flavor but also helps the biscuits rise and gives them a soft texture.
- Honey or Sugar (optional, 1 tablespoon): If you like a slight sweetness, add a tablespoon of honey or sugar.
Table: Gluten-Free Buttermilk Biscuits Ingredients
| Ingredient | Amount | Purpose |
|---|---|---|
| Gluten-Free All-Purpose Flour | 2 cups | Main dry ingredient |
| Baking Powder | 1 tablespoon | Leavening agent to help biscuits rise |
| Baking Soda | 1/2 teaspoon | Adds lightness and helps with browning |
| Salt | 1/2 teaspoon | Enhances flavor |
| Cold Butter | 1/2 cup | Adds flakiness and richness |
| Buttermilk | 3/4 cup | Moisture and tanginess |
| Honey or Sugar (optional) | 1 tablespoon | Optional sweetness |
Tips for Substituting Ingredients:
- Dairy-Free Option: For a dairy-free version, replace the butter with dairy-free butter and use almond milk or oat milk in place of buttermilk.
- Flour Substitutes: If you’re experimenting, you could try other gluten-free flours like almond flour or rice flour, but the texture may change. A blend of different gluten-free flours typically works best.
Step-by-Step Guide to Making Gluten-Free Buttermilk Biscuits
Preparing the Dry Ingredients
To start, whisk together the dry ingredients in a large bowl. Combine the gluten-free all-purpose flour, baking powder, baking soda, and salt. Whisking them ensures even distribution and prevents clumping, which could result in unevenly risen biscuits.
Cutting in the Butter
Next, it’s time to incorporate the cold butter into the dry mixture. You can use a pastry cutter or simply cut the butter into small cubes with a knife, then rub the butter into the flour mixture using your fingers or a pastry cutter. The goal is to achieve a texture that resembles coarse crumbs, with small bits of butter scattered throughout. This is the secret to making your biscuits flaky.
Adding the Buttermilk
Now, pour in the cold buttermilk. Gently stir the mixture with a wooden spoon until the dough begins to form. You’ll want to add just enough buttermilk so that the dough is moist but not too sticky. Avoid overmixing, as this can lead to tough biscuits. The dough should be thick, not runny.
Shaping and Cutting the Biscuits
Once the dough is combined, turn it out onto a lightly floured surface. Gently pat it into a rectangle about 1-inch thick. Now, fold the dough over itself several times (this is crucial for creating layers in your biscuits). After folding, roll the dough into a rectangle again, and use a round biscuit cutter or the edge of a glass to cut out biscuits. Be sure to press the cutter straight down without twisting, as twisting can prevent them from rising evenly.
Baking the Biscuits
Place the biscuits on a parchment-lined baking sheet, close together for soft edges, or spread out for crispier edges. Bake at 425°F (220°C) for 12-15 minutes or until golden brown. The high temperature helps the biscuits rise quickly, giving them that perfect golden crust.
Tips for Perfect Gluten-Free Buttermilk Biscuits
Achieving the perfect gluten-free buttermilk biscuit requires more than just following the steps. Here are some pro tips to help you make the best biscuits:
- Cold Ingredients are Key: Cold butter and buttermilk are crucial for creating flaky layers. If your ingredients are too warm, the butter will melt too quickly, resulting in denser biscuits.
- Don’t Overwork the Dough: Overworking the dough will result in tough biscuits. Mix the dough just enough to bring it together, and no more.
- Layer the Dough: Folding the dough over itself several times will create multiple layers, making your biscuits extra flaky.
- Use a High Baking Temperature: Bake at a high temperature (425°F) to create a beautiful rise and crisp, golden crust.
Common Mistakes to Avoid When Making Gluten-Free Biscuits
Even experienced bakers can make mistakes when switching to gluten-free recipes. To help you avoid pitfalls, here are some common mistakes and how to fix them:
- Using Too Much Liquid: Gluten-free flour absorbs moisture differently than wheat flour, so be careful with the amount of liquid you add. If the dough seems too sticky, add a little more flour.
- Not Using a Biscuit Cutter: A sharp biscuit cutter ensures clean edges and helps the biscuits rise evenly. Avoid using a knife or jagged edges.
- Overmixing the Dough: The more you mix, the denser your biscuits will become. Mix just until everything is combined.
How to Customize Your Gluten-Free Biscuits
If you’re looking to get creative, there are many ways to make your gluten-free buttermilk biscuits uniquely yours. Here are some ideas:
Add Extra Flavor
- Herbs and Spices: Add a tablespoon of finely chopped rosemary, thyme, or chives for an herbaceous flavor.
- Cheese: Grated cheddar or parmesan cheese makes for a savory, cheesy biscuit.
- Sweet Additions: A teaspoon of cinnamon or a handful of blueberries can turn your biscuits into a delightful treat.
Mix-ins
- Fruit: Fresh or dried fruit, like cranberries or raisins, can add a sweet contrast to the tangy buttermilk.
Gluten-Free Buttermilk Biscuits for Every Meal
These biscuits aren’t just for breakfast—they can be enjoyed with a variety of meals:
- Breakfast: Serve with scrambled eggs, sausage, and gravy for a hearty breakfast.
- Sides: These biscuits go perfectly with soups, stews, or roasted meats.
- Snacks: Enjoy them with butter, honey, or jam as a tasty afternoon snack.
Storing and Reheating Gluten-Free Biscuits
Storing:
- Let your biscuits cool completely before storing them in an airtight container at room temperature for up to 2-3 days.
Freezing:
- To freeze your biscuits, place them on a baking sheet and freeze them before transferring them into a freezer bag. Frozen biscuits will keep for up to 3 months.
Reheating:
- When you’re ready to enjoy them again, reheat the biscuits in the oven at 350°F for 5-10 minutes to restore their flakiness.
FAQs About Gluten-Free Buttermilk Biscuits
1. Can I make these biscuits dairy-free?
Yes, you can easily make these biscuits dairy-free by using dairy-free butter and a non-dairy milk like almond or oat milk instead of buttermilk.
2. Can I freeze the dough?
Absolutely! You can freeze the dough before baking. Shape the biscuits, freeze them, and bake them straight from the freezer. Just increase the baking time by 2-3 minutes.
3. Why did my biscuits turn out dense?
Dense biscuits can happen if the dough is overmixed or if there’s not enough liquid. Make sure to mix just enough to bring the dough together and not beyond that.
4. Can I use a different gluten-free flour blend?
Yes, you can experiment with other gluten-free flour blends, but make sure they have a good balance of texture. Some gluten-free flours may require additional binding agents like xanthan gum.
Conclusion
Making gluten-free buttermilk biscuits is easier than you think, and the result is just as delicious and comforting as the original version. Whether you’re gluten-sensitive or simply looking for a healthy alternative, these biscuits will quickly become a favorite in your recipe collection. With the right ingredients, techniques, and a little patience, you can enjoy warm, flaky biscuits at home—whenever you want.
Try These Extra Recipes
Gluten Free Biscuit Recipe
Banana Oatmeal Pancakes 3 Ingredients